Creating Unique Drum Kits: Layering and Processing Guide
Creating custom drum kits involves layering different drum sounds and applying various processing techniques to craft unique and personalized sonic textures, enhancing your music production capabilities.
Unleash your creativity and elevate your music production by creating custom drum kits: layering and processing for unique sounds. Discover how to combine individual drum elements, manipulate their sonic characteristics, and build a signature rhythm section that sets your tracks apart.
Understanding the Basics of Drum Kit Creation
Creating a custom drum kit is more than just selecting your favorite samples. It’s a process of carefully curating and manipulating individual sounds to create a cohesive and unique sonic palette. This involves understanding the nuances of different drum elements and how they interact together.
From selecting the right kick drum for that perfect thump to choosing just the right snare for a tight snap, the possibilities are endless. Consider the overall vibe you are aiming for.
Choosing Your Base Sounds
Start with a collection of individual drum samples. Look for sounds that inspire you and fit the genre of music you’re aiming to create. A solid foundation is essential for the rest of the process.
Consider sources like:
- Sample Packs: Numerous high-quality sample packs are available online, catering to different genres and styles.
- Live Recordings: Record your own drums or percussion instruments to create truly unique sounds.
- Virtual Instruments: Software drum machines and plugins offer a wide range of pre-designed kits and individual sounds.
When selecting base sounds, pay attention to:
- Frequency Content: Does the sample have the right balance of low-end, mid-range, and high-end frequencies?
- Transient Response: How quickly does the sound reach its peak volume, and how does it decay?
- Sonic Character: Does the sample sound clean, distorted, punchy, or subtle?
Ultimately, understanding the nuances of the sounds you are working will help you during the next steps in the process.

In essence, the basics of drum kit creation revolve around choosing the foundational sounds and meticulously tweaking them to achieve a desired sonic aesthetic.
Layering Drum Sounds for Depth and Texture
Layering is a crucial technique in creating custom drum kits because it allows you to combine multiple sounds to create a single, more complex sound. This can add depth, character, and uniqueness to your drum kit.
The goal is to blend sounds in a way that they complement each other, rather than clashing or canceling each other out.
How to Layer Effectively
Start by identifying the key frequencies you want to enhance in each drum element and then listen carefully to the sounds available to you.
Remember to:
- Complementary Frequencies: Layer sounds with different frequency ranges to fill out the sonic spectrum.
- Transient Shaping: Use layering to enhance or soften the initial attack of a drum sound.
- Blending Techniques: Adjust volume, panning, and EQ to create a seamless blend between layers.
To create a punchier kick drum, try layering a low-frequency sine wave with a transient-rich kick sample. For a snappy snare, experiment with layering a bright, crackly sample with a deeper, more resonant one.
Consider experimenting with:
- Parallel Processing: Send your layered drum sounds to separate aux tracks for individual processing like compression, saturation, and EQ.
- Creative Effects: Use effects like reverb, delay, and chorus to add space and dimension to your layered drums.
- Automation: Use automation to create dynamic changes in the volume, panning, and effects of your layered drums.
The layering, when done correctly, helps breathe new life to your soundscapes, allowing for exciting drum sounds.
Processing Techniques: EQ, Compression, and Saturation
Processing is where you sculpt the individual sounds and blend them together into a cohesive drum kit. Three of the most common and essential processing techniques are EQ, compression, and saturation.
Each of these tools play a crucial role in shaping the sonic characteristics of your drums.
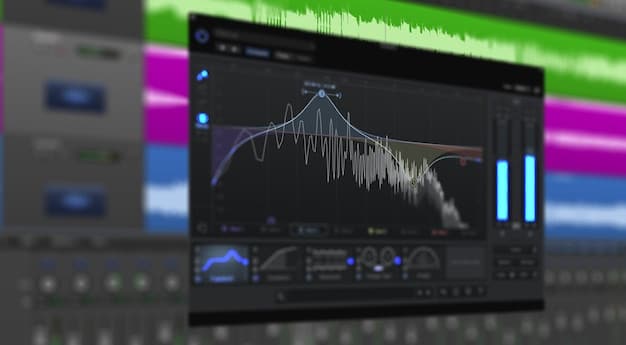
EQ: Correcting and Enhancing Frequencies
EQ is used to adjust the frequency content of a sound. It can be used to correct unwanted frequencies, enhance desirable ones, and create separation between different drum elements.
Consider the following:
- Cut Unwanted Frequencies: Use cuts to remove muddy lows, harsh mids, or dissonant peaks.
- Boost Desirable Frequencies: Use boosts to enhance the punch of a kick drum, the snap of a snare, or the sizzle of a cymbal.
- Shelving EQ: Broadly shapes the high and low frequencies, adding air and sparkle to your drums or thinning out the low end.
EQ is a very powerful tool and can be used to drastically change the sonic landscape of drum sounds.
Compression: Controlling Dynamics and Adding Punch
Compression reduces the dynamic range of a sound, making the quieter parts louder and the louder parts quieter. This can be used to add sustain, punch, and tightness to your drums.
Things to consider regarding compression are:
- Attack and Release: Control how quickly the compressor reacts to incoming audio and how quickly it releases the gain reduction.
- Ratio: Determines how much the signal is compressed after it crosses the threshold.
- Threshold: The level at which the compressor starts to apply gain reduction.
Compression is a great tool to use to glue the drums together to bring out the sound that you are looking for.
Saturation is a type of distortion that adds harmonics and warmth to a sound. It can be used to make drums sound thicker, more aggressive, and more present in the mix.
Common approaches that are used with saturation are:
- Tape Saturation: Simulates the sound of recording drums on analog tape, adding warmth and subtle compression.
- Tube Saturation: Simulates the sound of tube amplifiers, adding a richer, more aggressive distortion.
- Bitcrushing: Reduces the bit depth of a sound, creating a gritty, lo-fi effect.
These saturation tools enhance different aspects of sound and make it so that the sound is changed in a way that aligns with your vision.
The combination of EQ, compression, and saturation is key for defining sounds that fit your theme and style.
Advanced Processing: Transient Shaping and Gating
Beyond the basics of EQ, compression, and saturation, more advanced processing techniques can further refine and enhance your created custom drum kits. Transient shaping and gating are two such techniques.
These advanced tools offer more control over the dynamics and character of your drums.
Transient Shaping: Sculpting the Attack and Sustain
Transient shapers are processors that allow you to manipulate the attack and sustain portions of a sound independently. This can be useful for adding punch to a kick drum, tightening up a snare, or softening the attack of a cymbal.
Transient shapers help shape what is trying to be achieved, here are a few examples:
- Attack: Increasing the attack enhances the initial impact of a drum sound, making it sound more punchy.
- Sustain: Adjusting the sustain controls the length and decay of a drum sound, making it sound tighter or more spacious.
- Creative Effects: Some transient shapers offer additional features like saturation, EQ, and compression for further sonic sculpting.
Transient shapers give the user the flexibility to change the overall sonic palette of their drums.
Gating: Eliminating Noise and Tightening Up Sounds
Gating is a process that automatically cuts off a sound when it falls below a certain threshold. This can be used to eliminate unwanted noise, tighten up loose drum sounds, and create rhythmic effects.
Gating is used to minimize noise and create separation, here are the following factors:
- Threshold: Determines the level at which the gate opens or closes.
- Attack and Release: Control how quickly the gate opens and closes.
- Hysteresis: Prevents the gate from chattering or opening and closing rapidly around the threshold.
The use of these techniques help keep the sonic landscape clear and allows the sounds to breathe so they can blend together better.
The use of shaping and gating can significantly change drum sounds for the better, allowing for more creative liberties during the music creation process.
Mixing Your Custom Drum Kit into a Song
The final step in creating custom drum kits is mixing them into the context of a song. This involves balancing the levels of each drum element, carving out space in the mix with EQ, and using effects to create a cohesive and impactful drum sound.
The mixing phase also ensures that the drums fit well within the overall arrangement.
Balancing Levels and Panning
Start by setting the overall level of your drum kit in relation to the other instruments in the mix. Then, adjust the individual levels of each drum element to create a balanced and natural-sounding kit.
Ensure the following are considered:
- Kick and Snare: Typically form the backbone of the drum kit and should be prominent in the mix.
- Cymbals: Can add space and sparkle to the kit, but should not overpower the other elements.
- Overheads: Capture the overall sound of the kit and can be used to add width and depth to the mix.
The balancing of sound is critical to a well made overall drum sound.
EQ and Compression in the Mix
Use EQ to carve out space for your drums in the mix and prevent them from clashing with other instruments. Use compression to glue the drums together and make them sound more cohesive.
Keep in mind the points listed below when working on EQ and Compression:
- High-Pass Filter: Remove unnecessary low frequencies from non-bass elements to clean up the low end of the mix.
- Mid-Range Cuts: Reduce muddiness in the midrange by cutting frequencies around 200-500 Hz.
- Parallel Compression: Add punch and excitement to the drums by using a heavily compressed parallel track.
The combination of EQ and Compression enhances the mix of your drums, ensuring that the drums are the central focus of the listeners attention.
Successfully mixing your drum kit with the song you are working on allows you to create a strong song that draws listeners in.
Experimentation and Finding Your Unique Sound
Ultimately, creating custom drum kits is all about experimentation and finding a sound that is unique to your music. These techniques and strategies provide a solid foundation for creating custom kits, but further exploration will make for a personalized experience.
Don’t be afraid to break the rules, try new things, and push the boundaries of what is possible.
Tips for Experimentation
The use of unconventional sounds is an easy way to create drums that sound unique, be creative.
Ways to experiment include the following:
- Field Recordings: Record everyday sounds like doors slamming, water dripping, or traffic noise, and layer them with your drum sounds.
- Household Objects: Record the sounds of hitting pots, pans, bottles, or other household objects and turn them into percussive elements.
- Vocal Percussion: Experiment with beatboxing, mouth sounds, and vocal effects to create unique percussive textures.
Experimentation will allow you to make your sounds one of a kind, which will set you up to be a successful creator.
Developing Your Signature Sound
Over time, you will develop your ear for what sounds good and what works well in your music. Don’t be afraid to embrace your own unique style and create drum kits that reflect your artistic vision.
To achieve your signature sound, keep the following in mind:
- Consistency: Use similar processing techniques, effects, and layering strategies across your tracks to create a cohesive sonic identity.
- Originality: Don’t be afraid to experiment and try new things to create sounds that are truly unique.
- Feedback: Get feedback from other musicians and producers to refine your sound and improve your drum kit creation skills.
The tips above will help you along your journey to create your own signature sound that will define you as a creator.
Through experimentation and pushing boundaries, you’ll achieve a unique sound that defines you as an artist.
| Key Element | Brief Description |
|---|---|
| 🎶 Sound Selection | Choosing diverse drum sounds as the foundation of the entire kit. |
| 🎛️ Layering Techniques | Combining multiple drum samples to create richer sounds. |
| 🔊 Sound Processing | Using EQ, compression, and saturation to shape the drum kit. |
| 🎚️ Advanced Processing | Refining sounds using transient shaping and gating. |
FAQ
▼
Drum layering involves combining multiple drum samples to create a single, richer sound. It’s important because it allows you to achieve sonic textures and depth that are impossible to achieve with a single sample.
▼
EQ allows you to adjust the frequency content of your drum sounds, you can enhance and remove undesirable frequencies to maintain clarity. Understanding filters, boosts, and their effects are key to properly sculpt your drums.
▼
Comrpession reduces the dynamic range of your drums, leading to a louder, punchier, and controlled sound. It brings out the quieter parts making them more audible and the louder parts less overwhelming.
▼
Saturation adds harmonics and warmth to the drums, making them sound thicker and more aggressive. Different types of saturation, such as tape or tube styles, offer unique flavors to enhance.
▼
Transient shapers allow you to control the attack and sustain portions of a drum sound independently. This can add punch and presence to your kicks or tighten up the snare drums, making for a diverse range of sound manipulation.
Conclusion
Mastering the art of creating custom drum kits through layering and processing opens up a world of sonic possibilities within music production. By embracing these techniques, musicians can craft unique rhythmic identities that define their sound and captivate listeners.


