Mastering for Streaming: Optimize Your Music for Spotify & Apple Music

Mastering for streaming involves optimizing your music’s audio quality to meet the specific requirements of platforms like Spotify and Apple Music, ensuring the best possible listening experience for your audience and maximizing the impact of your tracks.
In today’s digital music landscape, mastering for streaming is a crucial step to ensure your tracks sound their best on platforms like Spotify, Apple Music, and other streaming services. It’s not just about making your music loud; it’s about crafting a balanced and optimized listening experience for your audience, and we’ll explore exactly how to do that.
Understanding the Importance of Mastering for Streaming
Mastering is the final stage of audio production, and it’s where your tracks are polished and optimized for distribution. But why is mastering for streaming different, and why is it so important?
Streaming services have their own unique playback characteristics, and understanding these is key to creating masters that translate well across platforms.
Level Normalization and Loudness Penalties
One of the most significant factors to consider is loudness normalization. Streaming services like Spotify and Apple Music use algorithms to normalize the perceived loudness of tracks, meaning they adjust the volume of each song to a consistent level. This prevents songs from sounding drastically different in volume, but it can also impact your master if you’re not careful.
If your master is too loud, it will be turned down by the streaming service, potentially reducing its impact and dynamic range. Conversely, if your master is too quiet, it may be turned up, which could introduce unwanted artifacts or distortion.
Codec Compression and Audio Quality
Another important consideration is codec compression. Streaming services use codecs like AAC and Opus to compress audio files, reducing their size for efficient streaming. This compression can impact audio quality, potentially introducing artifacts or reducing the clarity of your tracks.
By mastering specifically for these codecs, you can minimize the negative effects of compression and ensure your music sounds its best on streaming platforms.
Targeting LUFS for Optimal Playback
LUFS (Loudness Units Full Scale) is a standardized unit of measurement for perceived loudness. Streaming services use LUFS to normalize the volume of tracks, and targeting a specific LUFS value is crucial for mastering for streaming. Though guidelines can change, aiming for -14 LUFS integrated loudness is a good starting point for many platforms.
- Spotify: Targets -14 LUFS, reduces gain if the track is louder.
- Apple Music: Targets -16 LUFS, reduces gain if the track is louder.
- YouTube: Targets -13 LUFS, reduces gain if the track is louder.
Mastering for streaming involves understanding loudness normalization, codec compression, and targeting specific LUFS values to ensure your music sounds its best on these platforms. Now we will look at the mastering process.
The Mastering Process for Streaming
The mastering for streaming process involves several key steps, including gain staging, equalization, compression, limiting, and metering. Each step plays a crucial role in shaping the final sound of your tracks and optimizing them for streaming platforms.
Let’s take a closer look at each of these steps.
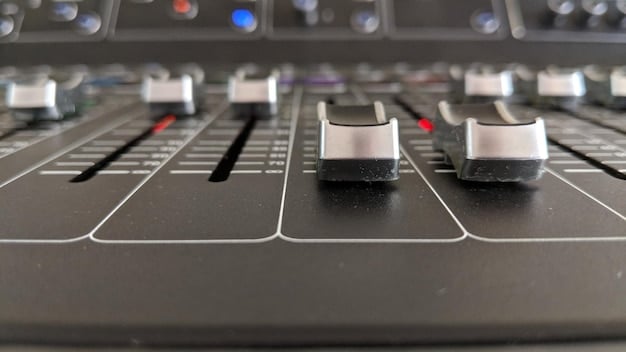
Gain Staging for a Clean Signal
Gain staging is the process of setting the input and output levels of your audio signals to optimize the signal-to-noise ratio and prevent clipping or distortion. For mastering for streaming, it’s especially important to ensure that your tracks have adequate headroom to accommodate the mastering process without clipping.
Start by carefully adjusting the gain of each track in your mix to achieve a healthy signal level without pushing the meters into the red. Aim for peaks around -6dBFS to -3dBFS to provide plenty of headroom for processing.
Equalization for Clarity and Balance
Equalization (EQ) is the process of adjusting the frequency balance of your tracks to achieve a desired tonal character. In mastering for streaming, EQ can be used to address frequency imbalances, enhance clarity, and create a more polished overall sound.
Use gentle, broad EQ strokes to shape the overall tonal balance of your tracks. Avoid making drastic cuts or boosts, as these can introduce unwanted artifacts or phase issues.
- High-pass filter: Remove unwanted low-frequency rumble and mud.
- Broad cuts: Tame harshness or resonance in specific frequency ranges.
- Gentle boosts: Enhance clarity and presence in the high frequencies.
Compression for Cohesion and Impact
Compression is the process of reducing the dynamic range of your tracks to create a more cohesive and impactful sound. In mastering for streaming, compression can be used to glue tracks together, add punch, and increase perceived loudness.
Use subtle compression settings with low ratios and slow attack times to gently control the dynamics of your tracks without squashing them. Experiment with different compression styles to find what works best for your music.
Limiting for Loudness and Dynamics
Limiting is the final step in the mastering process, and it’s used to maximize the loudness of your tracks while preventing clipping or distortion. In mastering for streaming, limiting is crucial for achieving competitive loudness levels without sacrificing dynamic range.
Use a high-quality limiter with transparent settings to gently increase the loudness of your tracks. Pay close attention to the limiter’s gain reduction meter to avoid over-limiting, which can introduce unwanted artifacts and reduce the impact of your music.
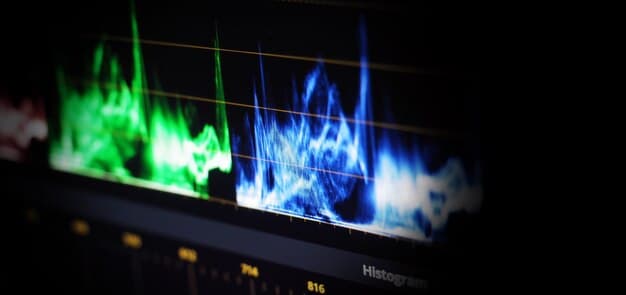
Metering and Monitoring for Accuracy
Metering and monitoring are essential for accurate and informed mastering decisions. Use a variety of metering tools to monitor loudness, peak levels, dynamic range, and other important parameters. Listen to your tracks on a variety of playback systems to ensure they translate well across different devices and listening environments.
By carefully considering each of these steps, you can create masters that are optimized for streaming platforms and deliver the best possible listening experience for your audience.
Specific Platform Considerations
Mastering for streaming isn’t a one-size-fits-all process. Each platform has its own unique playback characteristics and specifications, and it’s important to tailor your mastering approach accordingly.
Here’s a look at some specific considerations for popular streaming platforms.
Spotify: Loudness Normalization and File Format
Spotify normalizes the loudness of tracks to approximately -14 LUFS integrated loudness, with a maximum true peak of -1 dBTP (decibels True Peak). If your tracks exceed these levels, Spotify will reduce the gain to comply with its normalization standards.
Spotify uses the Opus codec for streaming, which is known for its efficiency and low-latency performance. When preparing your masters for Spotify, use high-quality WAV files with a sample rate of 44.1 kHz and a bit depth of 16 bits. This will ensure that your music sounds its best after Spotify’s encoding process.
Apple Music: Loudness Normalization and Mastering for iTunes
Apple Music normalizes the loudness of tracks to approximately -16 LUFS integrated loudness, with a maximum true peak of -1 dBTP. Like Spotify, Apple Music will reduce the gain of tracks that exceed these levels.
Apple Music uses the AAC codec for streaming, which is known for its high audio quality and efficient compression. If you plan on selling music via iTunes, you should strongly consider using the Mastering for iTunes. This process outlines the methods you can use to ensure your files used for distribution will sound as good or better than the streaming quality.
- Use high-resolution audio files: 24-bit/96 kHz is ideal.
- Avoid clipping: Ensure your masters have adequate headroom.
- Monitor true peak levels: Stay below -1 dBTP.
YouTube Music: Loudness Normalization and Dynamic Range
YouTube Music normalizes the loudness of tracks to approximately -13 LUFS integrated loudness, with a maximum true peak of -1 dBTP. While YouTube Music doesn’t have as stringent loudness normalization policies as Spotify and Apple Music, it’s still important to master your tracks with loudness normalization in mind.
YouTube Music supports a variety of audio codecs, including AAC, Opus, and Vorbis. When preparing your masters for YouTube Music, use high-quality WAV files with a sample rate of 44.1 kHz or 48 kHz and a bit depth of 16 bits or 24 bits.
Different parameters apply to various platforms. You can also distribute your music to multiple platforms simultaneously using resources like DistroKid.
Tools and Plugins for Mastering for Streaming
Mastering for streaming requires a variety of tools and plugins to shape the sound of your tracks and optimize them for streaming platforms. From equalizers and compressors to limiters and metering tools, there are many options to choose from.
Here are some essential tools and plugins for mastering for streaming.
Equalizers: Shaping the Tonal Balance
Equalizers are used to adjust the frequency balance of your tracks, allowing you to shape the tonal character and address frequency imbalances. Some popular equalizer plugins for mastering include FabFilter Pro-Q 3, iZotope Ozone Equalizer, and Waves Linear Phase EQ.
The FabFilter Pro-Q 3 is a versatile and transparent equalizer with a wide range of features, including dynamic EQ, mid/side processing, and a spectrum analyzer. The iZotope Ozone Equalizer is a powerful and intuitive equalizer with a vintage-inspired design and a variety of EQ modes. The Waves Linear Phase EQ is a clean and precise equalizer with minimal phase distortion.
Compressors: Controlling Dynamics and Adding Glue
Compressors are used to reduce the dynamic range of your tracks, adding punch, cohesion, and perceived loudness. Some popular compressor plugins for mastering include FabFilter Pro-C 2, iZotope Ozone Dynamics, and Waves SSL G-Master Buss Compressor.
The FabFilter Pro-C 2 is a versatile and transparent compressor with a wide range of compression styles and features. The iZotope Ozone Dynamics is a powerful and intelligent compressor with adaptive release control and a variety of compression modes. The Waves SSL G-Master Buss Compressor is a classic bus compressor known for its smooth and musical sound.
Limiters: Maximizing Loudness and Preventing Clipping
Limiters are used to maximize the loudness of your tracks while preventing clipping or distortion. Some popular limiter plugins for mastering include FabFilter Pro-L 2, iZotope Ozone Maximizer, and Waves L1 Ultramaximizer.
Metering Plugins: Monitoring Essential Statistics
Metering plugins provide real-time feedback on loudness, peak levels, dynamic range, and other important parameters, helping you make informed mastering decisions. Some popular metering plugins for mastering include iZotope Insight 2, Youlean Loudness Meter 2, and Waves WLM Plus Loudness Meter.
Best Practices for Achieving Optimal Streaming Results
Achieving optimal results with mastering for streaming involves a combination of technical expertise, creative decision-making, and attention to detail. There’s no single “right” way to master for streaming, but there are some best practices that can help you achieve consistent and professional-sounding results.
Here are some best practices for mastering for streaming:
Start with a Good Mix
Mastering can’t fix a bad mix. The better your mix sounds, the better your final master will be. Before you start mastering, make sure your mix is well-balanced, clear, and dynamic. Address any major issues with levels, EQ, or dynamics in the mix stage, rather than relying on mastering to fix them.
Use High-Quality Source Files
Mastering is a refining process, so it’s important to start with the highest quality source files possible. Use high-resolution audio files with a sample rate of 44.1 kHz or 48 kHz and a bit depth of 24 bits. Avoid using compressed audio files like MP3s or AACs, as these can introduce artifacts and reduce the quality of your masters.
Take Breaks and Listen Critically
Mastering can be fatiguing, so it’s important to take breaks and listen critically. Step away from your monitors every 30-60 minutes to give your ears a rest. When you return, listen to your tracks with fresh ears and pay attention to the overall balance, clarity, and dynamics. Avoid getting caught up in minute details, and focus on the overall listening experience.
- Listen on different devices: Headphones, speakers, car stereo.
- Compare to reference tracks: Identify areas where your master can be improved.
- Get feedback: Ask other musicians or engineers for their opinions.
By following these best practices, you can ensure that your masters are optimized for streaming platforms and deliver the best possible listening experience for your audience.
| Key Point | Brief Description |
|---|---|
| 🔊 Loudness Normalization | Streaming services adjust volume; master with LUFS in mind. |
| 🎚️ Gain Staging | Optimize signal-to-noise; avoid clipping during mastering. |
| 🎧 Critical Listening | Take breaks, listen on different devices for accuracy. |
| 🎼 High-Quality Source | Start with WAV files (44.1 kHz/24 bit) for best results. |
Frequently Asked Questions
▼
Spotify normalizes to approximately -14 LUFS integrated. Aiming for this level ensures your track won’t be turned down too much, maintaining its impact. It’s a good balance between loudness and dynamic range.
▼
Apple Music normalizes to around -16 LUFS integrated. Tracks mastered for Apple Music may require less loudness than those for Spotify to avoid being turned down significantly during playback.
▼
High-quality WAV files (44.1 kHz/16 bit) are generally recommended. These files provide a good balance between audio quality and file size, ensuring optimal encoding for streaming platforms.
▼
Proper gain staging optimizes the signal-to-noise ratio and prevents clipping. Adequate headroom ensures your tracks have space for mastering without distortion, maintaining clarity and impact.
▼
Use a dedicated loudness metering plugin like iZotope Insight or Youlean Loudness Meter. These tools provide real-time LUFS measurements, helping you accurately target the desired loudness for various streaming platforms.
Conclusion
Mastering for streaming is a nuanced process that requires careful attention to detail and an understanding of the specific requirements of each platform. By following the best practices outlined in this guide, you can ensure that your music sounds its best on Spotify, Apple Music, and other streaming services, delivering a polished and professional listening experience for your audience.


")