Recording Studio Setup: Build a Pro Home Studio on a Budget
Setting up a professional home recording studio on a budget involves selecting essential equipment like a good microphone, audio interface, and headphones, while optimizing your space for acoustics and minimizing costs through smart choices and DIY solutions.
Ready to unleash your musical creativity without breaking the bank? This guide walks you through every step of **recording studio setup: build a professional home studio on a budget**, ensuring you have the tools and knowledge to create high-quality recordings in the comfort of your own home.
Creating Your Home Recording Studio: A Step-by-Step Guide
Building a home recording studio can seem daunting, but with the right approach, it’s entirely achievable on a budget. This section will break down the essential steps, from planning your space to selecting the right equipment, ensuring you get the most bang for your buck.
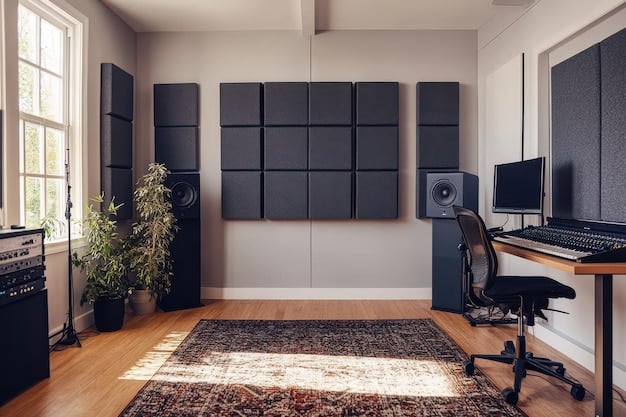
Define Your Space
The first step is to choose a room that can be dedicated to your recording setup. Consider factors like size, shape, and existing acoustics. A smaller room might be easier to treat acoustically, while a larger room offers more flexibility in terms of instrument placement.
Acoustic Treatment Essentials
Proper acoustic treatment is crucial for achieving professional-sounding recordings. This doesn’t necessarily mean spending a fortune on expensive panels. You can start with DIY solutions like using heavy curtains, blankets, or strategically placed furniture to absorb sound reflections.
- Room Analysis: Identify areas in your room where sound reflections are most prominent. Clapping your hands and listening for echoes can help.
- Bass Traps: Address low-frequency issues by placing bass traps in corners, as these are often the biggest culprits for muddy sound.
- Absorption Panels: Use absorption panels to reduce unwanted reflections on walls and ceilings, creating a more controlled recording environment.
By carefully planning and implementing these steps, you can lay a solid foundation for creating high-quality recordings in your home studio.
Essential Equipment for Your Recording Studio
No matter your budget, a few key pieces of equipment are essential for a functional recording studio. We’ll cover the must-haves, focusing on affordable options that don’t compromise on quality.
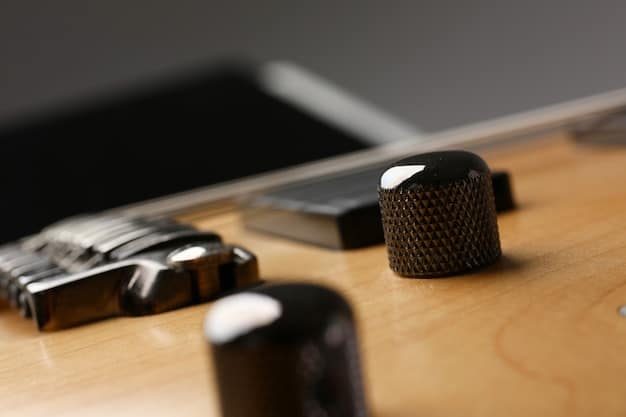
The Microphone Matters
A good microphone is the heart of any recording studio. Condenser microphones are a versatile choice for vocals and instruments. Research reputable brands known for their quality and affordability.
Audio Interface: Your Sound Hub
An audio interface is essential for converting analog signals from your microphone and instruments into digital signals that your computer can understand. Look for an interface with at least two inputs and low-latency performance.
- Input/Output Needs: Determine how many inputs you need based on the number of simultaneous sources you plan to record.
- Latency Performance: Low latency is crucial for real-time monitoring while recording.
- Budget-Friendly Options: Explore entry-level interfaces from reputable brands known for their reliability and performance.
Investing in these essential pieces of equipment will provide a solid foundation for your home recording studio, allowing you to capture high-quality audio without breaking the bank.
Acoustic Treatment on a Budget: DIY Solutions
Effective acoustic treatment doesn’t always require expensive, professionally-made panels. There are numerous DIY solutions that can significantly improve your room’s acoustics without emptying your wallet. This section explores some of the most practical and cost-effective methods.
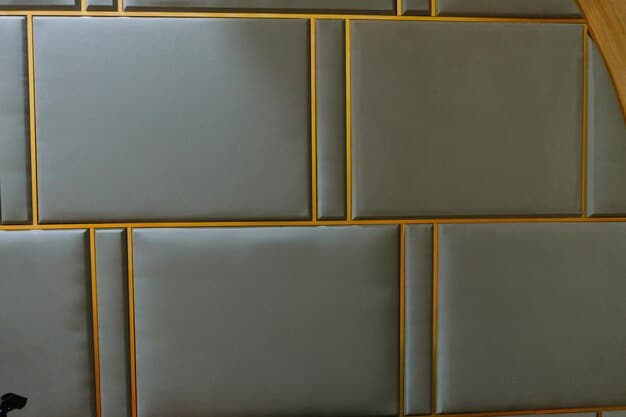
DIY Absorption Panels
Building your own absorption panels is a relatively simple and cost-effective way to treat your recording space. You’ll need wood frames, insulation material (such as mineral wool or fiberglass), and fabric to wrap the panels.
Strategic Placement of Furniture
Existing furniture can also be used to improve your room’s acoustics. Bookcases filled with books, heavy curtains, and rugs can all help absorb sound and reduce reflections.
- Bookcases: Position bookcases along walls to diffuse sound waves.
- Curtains: Hang heavy curtains over windows or walls to absorb sound reflections.
- Rugs: Place rugs on hard floors to reduce echoes and dampen sound.
Implementing these DIY acoustic treatment solutions can dramatically improve the sound quality of your recordings without breaking the bank.
Software and DAWs: Free and Affordable Options
Digital Audio Workstations (DAWs) are the heart of modern recording. While some DAWs come with hefty price tags, there are several excellent free and affordable options available. Choosing the right DAW is crucial for your workflow and creative process.
Free DAWs: Powerful and Capable
Several free DAWs offer a surprising amount of features and functionality. These options are perfect for beginners and budget-conscious musicians who want to start recording without spending any money.
Affordable DAWs: Balancing Cost and Features
If you’re willing to spend a little money, you can unlock even more features and capabilities with affordable DAWs. These options often offer a better user experience and more advanced tools than their free counterparts.
- Reaper: A highly customizable DAW with a generous trial period and an affordable license.
- Studio One Prime: A free version of PreSonus’s popular DAW with a streamlined workflow and essential features.
- Cakewalk by BandLab: A completely free DAW with a full suite of features and plugins.
Choosing the right DAW is a personal decision, but exploring these free and affordable options can help you find the perfect fit for your recording needs and budget.
Cables, Stands, and Accessories: Budget-Friendly Choices
While microphones, interfaces, and DAWs get most of the attention, cables, stands, and other accessories are equally important for a functional recording studio. Fortunately, you can find budget-friendly options that won’t compromise on quality or reliability.
Quality Cables on a Budget
Investing in decent-quality cables is essential for reliable signal transmission and preventing unwanted noise. Look for balanced XLR cables for microphones and instrument cables for guitars and keyboards.
Sturdy Stands for Microphones and More
A good microphone stand is essential for positioning your microphone correctly and ensuring stable recordings. Similarly, stands for instruments, monitors, and headphones can help you optimize your workspace and improve your workflow.
- Microphone Stands: Look for adjustable microphone stands with a stable base and a secure grip.
- Instrument Stands: Use instrument stands to keep guitars, keyboards, and other instruments within easy reach.
- Monitor Stands: Elevate your studio monitors to ear level for accurate sound reproduction.
By carefully selecting budget-friendly cables, stands, and accessories, you can complete your recording studio setup without overspending.
Optimizing Your Workflow and Staying Creative
Building a home recording studio is just the first step. Optimizing your workflow and staying creative are essential for making the most of your setup and producing great music. This section offers tips and strategies for improving your recording process and maintaining your creative spark.
Organize Your Workspace
A well-organized workspace can significantly improve your workflow and reduce distractions. Keep your equipment within easy reach, label cables, and declutter your space regularly.
Experiment with Different Techniques
Don’t be afraid to experiment with different recording techniques and microphone placements. Try recording in different parts of the room, using different microphones, and experimenting with EQ and compression.
- Microphone Placement: Experiment with different microphone placements to capture different sounds and textures.
- EQ and Compression: Use EQ and compression to shape the sound of your recordings and achieve a professional-sounding mix.
- Collaboration: Collaborate with other musicians to spark new ideas and learn from each other.
By optimizing your workflow and staying creative, you can make the most of your home recording studio and produce great music that you’re proud of.
| Key Point | Brief Description |
|---|---|
| 🏠 Space Definition | Choose a suitable room considering size and acoustics. |
| 🎤 Essential Equipment | Invest in a good microphone and audio interface. |
| 🛠️ DIY Acoustics | Use DIY solutions like panels and strategic furniture. |
| 🎧 Software Choice | Explore free or affordable DAWs for your recordings. |
Frequently Asked Questions
▼
The most essential piece of equipment is a good quality microphone. A condenser microphone is a versatile choice for recording vocals and instruments, providing clear and detailed audio capture.
▼
Acoustic treatment is very important for a home recording studio. It helps to control sound reflections and reduce unwanted noise, improving the overall quality and clarity of your recordings.
▼
Yes, you can use free software for recording music. There are several excellent free Digital Audio Workstations (DAWs) available that offer a wide range of features and capabilities for recording and editing audio.
▼
An audio interface is a device that converts analog signals from your microphone and instruments into digital signals that your computer can understand. It’s essential for recording high-quality audio into your computer.
▼
To reduce background noise, record in a quiet environment, use a pop filter with your microphone, and consider using noise reduction software. Proper acoustic treatment can also minimize room noise.
Conclusion
Building a professional home recording studio on a budget is entirely possible with careful planning, smart equipment choices, and a bit of DIY ingenuity. By following these steps, you can create a recording environment that inspires creativity and produces high-quality results, without breaking the bank.

")


