Mastering on a Budget: Loudness Without Sacrificing Dynamics (2025)

Mastering on a budget in 2025 involves understanding digital tools, optimizing dynamics, and achieving desired loudness without compromising sound quality using techniques like gain staging and EQ adjustments.
Achieving a professionally mastered sound doesn’t have to break the bank. In today’s music production landscape, accessible tools and techniques empower artists to take control of their sound. Let’s explore how to approach mastering on a budget: achieve loudness without sacrificing dynamics (2025 edition), ensuring your music sounds its best without emptying your wallet.
Understanding Mastering and Its Core Principles
Mastering is often seen as a mysterious final step in music production, but it’s fundamentally about preparing your tracks for distribution. It involves enhancing the overall sonic qualities, ensuring consistency across an album or EP, and optimizing the track for various playback systems.
Before diving into budget-friendly techniques, let’s solidify the core principles that guide the mastering process:
What is Mastering?
Mastering is the process of taking a mixed audio track and preparing it for distribution, optimizing it for various playback formats and devices. This may involve adjusting levels, EQ, compression, and other effects to achieve a polished and consistent sound.
Why is Mastering Important?
Mastering ensures your music sounds its best on radios, streaming platforms, and is both consistent and pleasant to listen to. It can enhance the overall impact and engagement of your tracks.
- Consistency: Mastering creates a cohesive sound across an entire album or EP.
- Optimization: It ensures the track sounds good on various playback systems, from headphones to car stereos.
- Polish: Mastering adds a final layer of refinement, enhancing the overall sonic quality of the music.
In essence, mastering is about making your music the best it can be before it reaches your audience. Understanding these principles sets the stage for effective and budget-conscious mastering strategies.
Setting Up Your Budget Mastering Studio
You don’t need expensive equipment to achieve a professional master. With careful planning and smart choices, you can create a budget-friendly mastering environment. Let’s explore the essential tools and techniques for building your setup.
Here’s how you can create an effective mastering setup without breaking the bank:
Essential Equipment
While high-end equipment can improve your mastering, you can start with several inexpensive tools. The first of the must-haves is a decent pair of headphones and studio monitors.
Software and Plugins
The heart of your mastering setup will be your DAW (Digital Audio Workstation) and plugins. Fortunately, many affordable and open-source options are available.
- DAW: Reaper is a cost-effective DAW with powerful features suitable for mastering.
- EQ: Voxengo PrimeEQ is a free, quality EQ plugin for subtle tonal adjustments.
- Compressor: TDR Kotelnikov is a free compressor known for its transparent and versatile sound.
- Limiter: LoudMax is a free loudness maximizer that helps achieve competitive loudness levels.
Creating a budget mastering studio is about making smart choices. By focusing on essential equipment and leveraging free or affordable software, you can build a setup that delivers professional results.

Gain Staging: The Foundation of Loudness and Dynamics
Gain staging is a critical technique for maximizing loudness without sacrificing dynamic range. It involves managing the signal level at each stage of the production process to avoid clipping and maintain a healthy signal-to-noise ratio.
Here’s how to master gain staging for optimal results:
What is Gain Staging?
Gain staging refers to the process of optimizing the volume level at each stage of your audio production, from recording to mixing to mastering. Proper gain staging ensures that your signals are neither too quiet (resulting in noise) nor too loud (resulting in clipping or distortion).
How to Implement Effective Gain Staging
Start by ensuring that your tracks are recorded at a healthy level, aiming for peaks around -18dBFS. Maintain consistent gain levels throughout the mixing process.
- Recording: Set input gains to capture signals cleanly without clipping.
- Mixing: Adjust faders and plugin gains for optimal headroom, avoiding excessive levels.
- Mastering: Use subtle gain adjustments and metering to achieve target loudness levels.
By mastering gain staging, you can ensure that your tracks have a solid foundation for mastering, allowing you to increase loudness without sacrificing punch and clarity.
Compression: Adding Glue and Controlling Dynamics
Compression is a crucial tool in mastering, used to glue elements together, control dynamic range, and add punch and clarity. Mastering the subtle art of compression requires a keen ear and a nuanced approach.
Let’s delve into how you can use compression to enhance your master:
Understanding Compression Parameters
The key parameters of a compressor include threshold, ratio, attack, release, and makeup gain. Each parameter affects the sound in distinct ways and requires careful calibration.
- Threshold: Determines when the compressor starts working, affecting gain when the sound goes past a certain level.
- Ratio: Sets the amount of gain reduction applied to signals above the threshold.
- Attack: Affects how quickly the compressor starts reducing gain, influencing the transient response.
- Release: Affects how long the compressor takes to stop reducing gain, impacting the sustain and overall feel.
Best Practices for Mastering Compression
When mastering, go with subtle compression settings—avoid aggressive compression. Start with a low ratio (e.g., 1.5:1 or 2:1) and a slow attack time (e.g., 10-30ms) to preserve the transients.
Compression in mastering is about subtle enhancements; carefully adjusting your parameters contributes to a polished and impactful final master.
EQ: Sculpting the Sonic Landscape
Equalization (EQ) is a powerful tool for shaping the tonal balance of your master. It allows you to correct imbalances, enhance clarity, and add a final polish to your tracks. Using EQ tastefully contributes to a refined and balanced mix.
Here’s how to effectively use EQ in your mastering process:
To begin, use very broad, gentle boosts and cuts when performing equalization (EQ). A broad EQ boost around 10kHz can add perceived clarity an definition.
EQ can be also employed in the following manner:
- Corrective EQ: Address tonal imbalances or issues in the mix, such as muddiness or harshness.
- Enhancing EQ: Subtly enhance specific frequencies to add clarity, warmth, or air to the overall sound.
- Surgical EQ: Use narrow cuts to remove unwanted resonances or frequencies.
EQ is about subtle refinements that enhance the existing qualities of the mix. Careful and measured application of EQ can significantly improve the overall listening experience.
Limiting: Achieving Loudness
Limiting is the final stage in mastering, where you maximize the loudness of your track while preventing clipping. It’s a crucial step for achieving competitive loudness levels, but it requires caution to avoid over-compression and distortion.
Let’s explore the how-to’s of limiting without crushing your dynamics:
Understanding Limiters
A limiter is a type of compressor with an infinite ratio, meaning that any signal exceeding the threshold will be reduced. Limiters are used to maximize loudness by reducing the dynamic range and pushing the overall level of the track.
Best Practices for Mastering Limiting
Start by setting your limiter’s output ceiling to -0.3dBFS to prevent intersample peaks. Gradually increase the input gain until you reach your desired loudness level. Keep an eye on gain reduction and listen carefully for distortion or pumping effects.
Limiting is a delicate balance between loudness and dynamics. Cautious and informed limiting helps achieve a professional and impactful sound that stands out in today’s competitive music landscape.
Monitoring and Critical Listening
Critical listening is the cornerstone of effective mastering. Whether you’re using budget equipment or high-end gear, your ability to accurately assess the sound is paramount. Developing your monitoring skills is crucial for making informed decisions.
Here is how to nurture your critical listening acumen:
Familiarize yourself with how your mixes sound on a variety of different playback systems, be it, for example, headphones or car audio systems. If you do not know how your mixes sound on each of the systems, you will not be in a position to make corrections that enhance your mixes.
- Reference Tracks: Compare your master to professionally mastered tracks in a similar genre to identify areas for improvement.
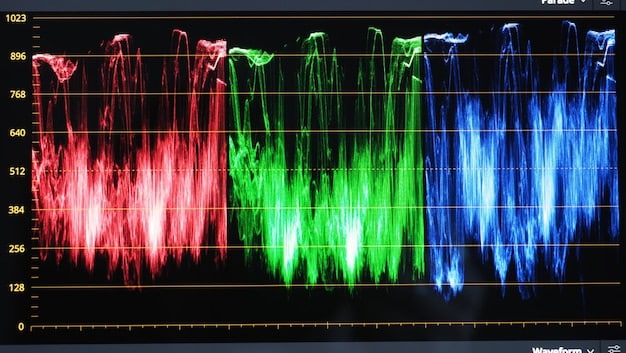
- Stereo Imaging: Check the width and balance of your mix using a wide-field stereo imager to ensure a natural sound.
- Ear Fatigue: Mastering can be mentally taxing. Take frequent breaks to avoid ear fatigue and maintain objectivity.
By honing your critical listening skills, you can make informed decisions that enhance your maser.
| Key Point | Brief Description |
|---|---|
| 💡 Gain Staging | Sets optimal levels at each production stage to avoid clipping and maintain dynamics. |
| 🎧 Budget Setup | Uses affordable software (Reaper, Voxengo) and essential equipment for effective mastering. |
| 🔊 Limiting | Maximizes loudness while preventing clipping, balancing levels. |
| 🎚️Compression | Adds glue, controls dynamics with subtle settings (low ratio, slow attack). |
Frequently Asked Questions (FAQ)
▼
The most important aspect is mastering your listening skills. This involves training your ear to accurately hear subtle differences and identify areas for improvement, regardless of equipment cost.
▼
Reaper is an excellent DAW for most levels of mixing due to its affordability and professional features. For plugins, there are many free options worth investigating.
▼
Aim for a loudness level that is appropriate for your genre. For electronic music, a LUFS of -7 to -9 is common. For a genre like classical, -14 to -16 may be best.
▼
Listen to your master from a variety of playback systems, including headphones, studio monitors, and car stereos to get a sense of how it sounds across different devices.
▼
Use a low compression ratio and a slow attack time. Also, listen carefully and use your ears. Do not overcorrect your master as this will impact quality.
Conclusion
Mastering on a budget in 2025 is entirely feasible with the right knowledge, tools, and approach. By understanding crucial techniques like gain staging, compression, EQ, and limiting, you can achieve professional-sounding masters without breaking the bank. Remember, critical listening is your greatest asset, and continuous learning will refine your skills and enhance the quality of your work.


