Building a home studio on a budget: essential gear for underground musicians (2025)
Aspiring underground musicians can equip a functional home studio by prioritizing essential gear like audio interfaces, microphones, and DAWs, balancing quality with affordability to produce professional-sounding recordings by 2025.
For any underground musician, the dream of laying down tracks without breaking the bank is within reach. Building a home studio on a budget: essential gear for underground musicians in 2025 isn’t just a pipe dream anymore; it’s a tangible goal that smart planning and savvy purchases can make a reality. Whether you’re a burgeoning rapper, an indie rock guitarist, or an experimental electronic artist, having your own dedicated space to create and record means freedom, flexibility, and endless possibilities for your sound.
The foundational pillars: understanding your core needs
Before diving into specific gear, it’s crucial to understand the fundamental components that form the backbone of any home recording setup. These are the non-negotiables, the pieces of the puzzle that enable you to capture, manipulate, and mix your artistic vision.
At its heart, a home studio, even on a tight budget, must address several key functions: audio input, processing, monitoring, and software control. Each element plays a symbiotic role, contributing to the overall quality and efficiency of your recording process.
The computer as your command center
Your computer isn’t just for internet browsing; it’s the central processing unit for your musical endeavors. While a top-tier machine might seem ideal, a moderately powerful laptop or desktop from the last few years can handle most recording tasks.
- Processor: Aim for an Intel Core i5 or AMD Ryzen 5 equivalent or better.
- RAM: 8GB is a baseline, but 16GB will provide much smoother performance, especially when using multiple plugins.
- Storage: An SSD (Solid State Drive) is paramount for loading projects and samples quickly, vastly improving workflow.
Remember, the goal is functionality, not overspending. Optimizing your current system by cleaning up old files and ensuring it’s free of unnecessary background processes can also boost its performance significantly.
Digital audio workstation (DAW): your creative playground
The DAW is where all the magic happens. It’s software that allows you to record, edit, mix, and master your music. Fortunately, there are fantastic free and budget-friendly options available that offer professional-level capabilities.
For instance, BandLab offers a compelling free mobile and web-based solution for collaborative creation, while Reaper provides an incredibly powerful, affordable, and flexible alternative for desktop users. These platforms often come with built-in effects and virtual instruments, minimizing the need for expensive third-party plugins in the beginning stages.
The choice of DAW is highly personal and often depends on your workflow and the genres you pursue. Spending time exploring free demos can help you find the one that resonates best with your creative process, ensuring you invest in a tool that genuinely enhances your output rather than hindering it.
Ultimately, laying a strong foundation with a capable computer and a suitable DAW sets the stage for all subsequent gear acquisitions. These are the core elements that empower you to start creating music without unnecessary barriers, directly addressing the core needs of an underground musician on a budget.
Capturing sound: microphones and audio interfaces
Once you have your computer and DAW, the next critical step is to get sound into your system. This involves two essential pieces of gear: microphones and an audio interface. These components bridge the gap between your acoustic sounds – be it a vocal, an instrument, or an amplifier – and the digital realm of your DAW.
Microphones: your voice to the world
Choosing the right microphone can significantly impact the quality of your recordings. For a budget home studio, focusing on versatility is key rather than specific, high-end niche mics.
Condenser microphones are often recommended for vocals and acoustic instruments due to their sensitivity and ability to capture a broad frequency range. Dynamic microphones, while less sensitive, are excellent for loud sources like guitar amplifiers, drums, or even rough-and-ready vocals, offering durability and often a more focused sound.
- Large-Diaphragm Condenser (LDC): Ideal for capturing detailed vocals and acoustic guitars. Many affordable options exist, such as the Audio-Technica AT2020 or Behringer C-1.
- Dynamic Microphone: Essential for instruments, live vocals, and general utility. The Shure SM57 or SM58 are industry standards, even if used for raw, aggressive sounds.
- USB Microphones: While convenient for starting, they offer less flexibility than XLR mics connected to an interface. However, for a truly minimalist setup, a good quality USB mic like the Rode NT-USB Mini can be a viable starting point.
Consider the types of sounds you plan to record most frequently. If vocals are primary, prioritize a decent condenser. If you’re miking amps, a dynamic mic might be your first choice. Many musicians start with one versatile microphone and expand their collection as their needs evolve and their budget allows.
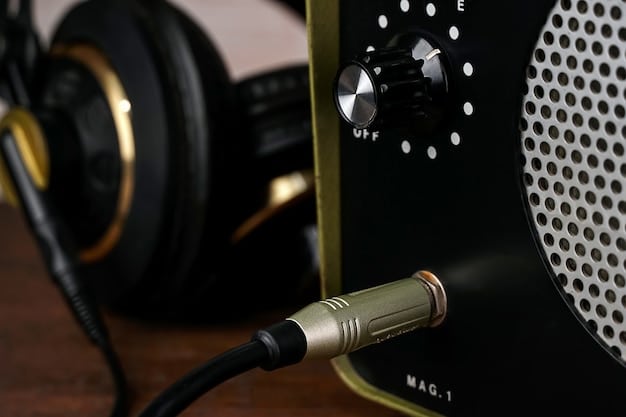
Audio interfaces: the bridge to digital
An audio interface is the device that converts analog audio signals from your microphone (or instrument) into digital data that your computer can understand. It also typically provides phantom power for condenser microphones and low-latency monitoring, meaning you hear your performance in real-time without distracting delays.
For a budget setup, a 2-input/2-output USB interface is usually sufficient. This allows you to record one or two sources simultaneously, which is perfect for solo musicians or duos.
- Number of Inputs: A two-input interface is generally enough for vocals and an instrument, or two instruments.
- Preamp Quality: Even budget interfaces like the Focusrite Scarlett Solo or Behringer UMC202HD often come with surprisingly good preamps, vital for clean signal capture.
- Latency: Look for interfaces with good driver support to ensure minimal delay between input and output.
The audio interface is a critical component that should not be overlooked. While you might try to cut corners elsewhere, a reliable interface ensures that the sound you capture is clean and clear, providing a solid foundation for your mixing process. It’s the unsung hero that ensures your creative output is faithfully translated into the digital realm.
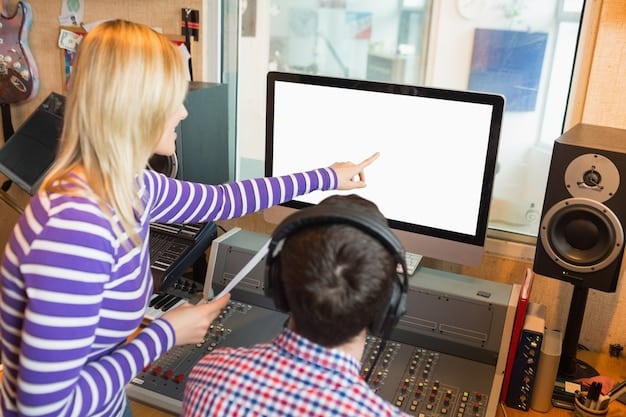
Listening critically: headphones and studio monitors
Once you’re capturing sound, you need to hear it accurately. This brings us to the crucial aspect of monitoring. Trying to mix on consumer headphones or standard computer speakers is like trying to paint a masterpiece in a dimly lit room – you simply won’t see the true colors.
Headphones: essential for tracking and detail work
A good pair of studio headphones is indispensable, especially in budget studios where acoustic treatment might be minimal or non-existent. They allow for focused listening, critical for isolating individual tracks, identifying subtle noises, and detailed editing.
While open-back headphones offer a more natural soundstage, closed-back headphones are generally preferred for tracking due to their superior isolation, preventing microphone bleed. For mixing, a good pair of open-backs can reveal more detail, but for budget constraints, a versatile closed-back pair can serve dual purposes.
- Closed-back for tracking: Prevents headphone audio from bleeding into your microphone.
- Neutral frequency response: Avoid “bass-heavy” consumer headphones, which color the sound and lead to inaccurate mixes. Look for headphones marketed as “studio” or “monitoring.”
- Comfort: You’ll be wearing them for extended periods, so comfort is key.
Popular choices for various budget levels include the Audio-Technica ATH-M20x/M40x or Sony MDR-7506. These provide a relatively flat frequency response, essential for making objective mixing decisions without being swayed by exaggerated bass or treble.
Studio monitors: giving your mix perspective
While headphones are great for detail, studio monitors provide a more accurate representation of how your music will sound in a real-world listening environment. They offer a broader soundstage and allow you to hear the interaction between instruments in a more natural way.
For a budget home studio, a pair of active (powered) near-field monitors is the way to go. “Near-field” means they are designed to be listened to at close range, minimizing the impact of room acoustics on the sound you hear. “Active” means they have built-in amplifiers, simplifying your setup and reducing costs.
- Flat frequency response: Similar to headphones, monitors should reproduce sound as faithfully as possible.
- Size: For smaller rooms, 5-inch or 6.5-inch woofers are often sufficient and less prone to exciting problematic room modes.
- Placement: Proper placement (equilateral triangle with your head, at ear height) is crucial for accurate monitoring.
Brands like KRK, JBL, and Behringer offer well-regarded budget monitor options that can provide a significant upgrade over consumer speakers. Investing in even modest studio monitors will greatly improve your ability to create balanced and professional-sounding mixes that translate well to other playback systems. They reveal spatial separation and depth that headphones often cannot fully convey, leading to more robust and impactful mixes.
The unsung heroes: cables, accessories, and acoustic treatment
While the big-ticket items like microphones and interfaces get all the attention, it’s the smaller, often overlooked accessories and considerations that can truly elevate a budget home studio. Neglecting these can undermine the quality of even the best gear.
Cables: the lifelines of your studio
It sounds mundane, but decent cables are essential. Cheap, poorly shielded cables can introduce unwanted noise and hums into your recordings, ruining an otherwise perfect take. You’ll need XLR cables for microphones and TRS cables for connecting your interface to your monitors.
- XLR cables: For microphones. Look for balanced cables to minimize interference.
- TRS cables: For connecting audio interface outputs to studio monitors. Again, balanced cables are preferred.
- Instrument cables: If recording guitars or basses directly into your interface.
You don’t need to splurge on boutique cables, but avoid the absolute cheapest options. A mid-range, reputable brand will provide reliable signal transfer and durability.
Microphone stands and pop filters
A sturdy microphone stand is non-negotiable for positioning your mic correctly and preventing accidental falls. Don’t skimp here; a cheap stand can be frustrating and even dangerous for your mic.
A pop filter is a simple, inexpensive accessory that sits between the vocalist and the microphone. It reduces plosives – the harsh ‘p’ and ‘b’ sounds that cause blasts of air to hit the microphone, creating an unpleasant popping noise. It also helps protect your microphone from moisture.
Acoustic treatment: taming your room
This is arguably one of the most impactful, yet often overlooked, aspects of a home studio, especially for those on a budget. Your room itself is a significant part of your sound. Hard, reflective surfaces cause echoes and standing waves, making it difficult to hear your mix accurately. While professional acoustic treatment can be expensive, effective budget solutions exist.
- DIY acoustic panels: Using rockwool or Owens Corning 703 wrapped in fabric can provide excellent absorption for bass and mid-range frequencies.
- Rugs and blankets: Laying down rugs on hard floors and hanging thick blankets on walls can quickly reduce reflections and dampen reverb.
- Strategic furniture placement: Arranging furniture and bookshelves can also break up reflective surfaces.
Even small efforts in acoustic treatment can make a dramatic difference in how clear and balanced your recordings and mixes sound, preventing you from making incorrect decisions based on misleading room acoustics. This is an area where DIY creativity can yield professional results for minimal investment.
By investing wisely in these “unsung heroes,” you ensure that the quality of your core gear is not compromised by poor connections or an uncooperative listening environment. These small details collectively contribute to a more professional and enjoyable recording experience.
Software and plugins: enhancing your sound
While your DAW forms the core of your software ecosystem, additional plugins can significantly expand your sonic palette and provide professional-grade tools for mixing and mastering. Many DAWs come with a solid suite of built-in plugins, but third-party options can offer unique sounds and functionalities. The key is to start with what you have and gradually add based on need, prioritizing free and affordable options.
Free plugins: powerful tools at no cost
The world of free plugins is vast and ever-growing. Many reputable developers offer excellent quality free VST (Virtual Studio Technology) plugins that can rival their paid counterparts. These include compressors, EQs, reverbs, delays, and virtual instruments. Searching for “free VST plugins” online will yield a wealth of resources.
- Saturation/Distortion: To add warmth or aggression to sounds.
- Reverb/Delay: For creating space and depth in your mixes.
- Virtual Instruments: Software synthesizers, samplers, and drum machines if your DAW’s built-in options are limited.
Explore communities and forums (like KVR Audio) dedicated to audio production; they often highlight the best free plugins available.
Affordable paid plugins and bundles
When you’re ready to invest, many companies offer affordable plugin bundles or individual plugins during sales. Look out for introductory offers or stripped-down “lite” versions of popular plugins. Often, these provide 80% of the functionality of their full-priced counterparts at a fraction of the cost.
A good starting point for paid plugins, if your budget allows, might be a high-quality compressor or an advanced EQ that offers more precision than your stock DAW plugins. Consider the specific challenges you face in your mixes and target plugins that directly address those issues. Avoid the trap of collecting too many plugins; focus on learning a few well before expanding.
Sample packs and virtual instruments
For electronic music, hip-hop, or any genre benefiting from programmed beats and synthesized sounds, sample packs and virtual instruments are invaluable. Many platforms offer free and affordable sample packs, perfect for building unique beats and textures without recording physical instruments.
Virtual instruments can range from realistic emulations of pianos and orchestral instruments to futuristic synthesizers. Many DAWs come with excellent built-in samplers and synths, but exploring free VST instruments can open up new creative avenues.
The beauty of software is its flexibility and cost-effectiveness compared to hardware. With a smart approach, you can build a powerful sonic arsenal without depleting your budget. Focus on quality over quantity and always assess if a new plugin truly fills a gap in your workflow or sound. This strategic approach ensures every software addition brings tangible value, propelling your creativity forward.
Optimizing your workflow: tips and tricks for efficiency
Having the right gear is one thing, but knowing how to use it efficiently is another. Optimizing your workflow means getting the most out of your setup, saving time, and ultimately producing better music. For underground musicians on a budget, efficiency is paramount, as time is often a limited resource.
Learn your DAW inside and out
Your Digital Audio Workstation is your primary tool. Spending time learning its shortcuts, understanding its routing capabilities, and exploring its native plugins will dramatically speed up your process. There are countless free tutorials on YouTube and integrated guides within most DAWs that can teach you valuable tricks. Knowing your DAW intimately allows you to translate creative ideas into sound more quickly and fluidly.
For example, mastering keyboard shortcuts for common tasks like cutting, pasting, looping, and quantizing can shave hours off your production time. Experiment with different features and don’t be afraid to read the manual or watch walk-throughs – this foundational knowledge pays dividends.
Organization and file management
A messy hard drive leads to a messy workflow. Establish a clear folder structure for your projects, recordings, samples, and plugins from day one. Back up your work regularly, either to an external hard drive or cloud storage. Losing a project due to disorganization or a hard drive crash is a devastating experience that can be easily avoided with good habits.
Name your tracks and takes clearly within your DAW. “Vocal_Take_1,” “Guitar_Lead_Final,” or “Synth_Bass_v2” are far more helpful than “Audio 1” or “New Track.” This seems minor, but when you return to a project weeks or months later, clear naming conventions will save you significant time and frustration.
Reference tracks and critical listening
One of the best ways to improve your mixing and mastering skills is to listen critically to music you admire. Drag a professional track into your DAW and compare it to your own. Pay attention to the balance of instruments, the clarity of the vocals, the stereo imaging, and the overall loudness. This practice trains your ears and gives you a benchmark for your mixes.
Don’t just listen passively; actively analyze what makes the reference track sound good. How are the drums sitting? Is the bass prominent or subtle? Where is the vocal placed in the mix? This habit, combined with A/B testing (comparing your mix at different stages), is crucial for making objective mixing decisions.
Optimizing your workflow is an ongoing process of refinement. Continuously look for ways to streamline your creative process, whether it’s through learning new techniques, organizing your files, or developing your critical listening skills. These habits, more than any piece of gear, will define your progress as an underground musician producing quality sound on a budget.
Future-proofing your studio: smart upgrades and longevity
Building a budget home studio in 2025 isn’t just about what you buy now; it’s also about planning for the future. As your skills grow and your needs evolve, you’ll naturally want to upgrade certain components. Smart planning ensures that initial investments remain valuable, and future purchases seamlessly integrate into your setup.
Modular thinking: buy what you need now, upgrade later
Resist the urge to buy the most expensive gear right out of the gate. Categorize your potential purchases into “essential,” “helpful,” and “luxury.” Start with absolute essentials. For example, a 2-input audio interface is perfect for a solo artist. If you later form a band and need to record drums, you can then upgrade to an interface with more inputs, or buy a separate multi-channel preamp that connects to your existing interface.
The goal is to build a system that can expand rather than be replaced entirely. This approach saves money in the long run and prevents you from accumulating gear you don’t truly need yet. Think of your studio as a living entity that evolves with your musical journey.
Investing in quality where it counts
While the budget is a major consideration, there are certain areas where a slight increase in investment can yield disproportionate returns. The audio interface and your primary microphone are often cited as prime examples. A higher quality interface often boasts better preamps and converters, which directly impacts the clarity of your recordings.
Similarly, a versatile, good-quality microphone can serve you well for years across various applications. These components are the foundation of your sound capture. Spending a little more here can prevent the need for an early replacement and ensure a higher standard for all your recorded material.
This isn’t about breaking the bank, but rather about being strategic. Sometimes, saving an extra $50 or $100 for a slightly better version of a key component can make a long-term difference.
Software longevity and ecosystem compatibility
When selecting your DAW and plugins, consider their longevity and compatibility. Popular DAWs like Reaper, GarageBand (for Mac users), or even the free versions of Ableton Lite or Pro Tools First (often bundled with interfaces) receive regular updates and have large user communities, meaning you’ll have support and resources for years to come.
Similarly, when investing in paid plugins, choose reputable developers known for regular updates and good customer support. Compatibility with future operating system versions is also a factor. Sticking to widely adopted formats like VST3, AU (for Mac), or AAX ensures broader compatibility across different DAWs if you ever decide to switch.
Future-proofing your studio is about making informed decisions now that support your artistic growth for years to come. By thinking modularly, prioritizing quality in key areas, and choosing software with good longevity, you ensure your initial investment continues to pay dividends, allowing you to focus on what matters most: creating compelling music.
| Key Point | Brief Description |
|---|---|
| 💻 Core Setup | A capable computer and a suitable Digital Audio Workstation (DAW) are the absolute foundation. Free/affordable DAWs like Reaper offer professional features. |
| 🎤 Audio Capture | Invest in a versatile microphone (condenser or dynamic) and a reliable audio interface to convert sounds into digital data. Quality preamps are key. |
| 🎧 Accurate Monitoring | Studio headphones and near-field monitors are crucial for objective listening and making informed mixing decisions. Avoid consumer-grade audio products. |
| 🛠️ Smart Optimizations | Don’t forget cables, stands, pop filters, and basic acoustic treatment (even DIY) as they significantly impact sound quality and workflow efficiency. |
Frequently asked questions
▼
Yes, absolutely. By leveraging free DAWs, affordable interfaces, and versatile microphones, it’s entirely possible to assemble a functional home studio for under $500. Focus on core essentials, utilize bundled software, and consider quality used gear. While it won’t be top-of-the-line, it will enable you to produce professional-sounding demos and even release-ready tracks with good mixing skills.
▼
While all components are important, a high-quality audio interface paired with a versatile microphone is often considered the most crucial initial investment. These two pieces directly impact the quality of the sound you capture. A clean input signal makes all subsequent steps, like mixing and mastering, much easier and more effective, ensuring your raw material is of the highest possible standard within your budget.
▼
Many free plugins are incredibly powerful and can absolutely contribute to professional-sounding mixes. Developers often release high-quality free versions of their paid software, or offer robust standalone tools. The key is to learn how to use them effectively. Rather than chasing endless new plugins, master the ones you have, whether free or bundled with your DAW, to maximize their potential in your productions.
▼
Acoustic treatment is critically important, even in a budget studio. It directly impacts how accurately you hear your music, preventing misleading reflections and standing waves that can cause poor mix decisions. While building expensive panels might be out of budget, simple DIY solutions like thick blankets, rugs, and strategic furniture placement can significantly improve your room’s acoustics and lead to better-sounding recordings and mixes.
▼
Buying used gear can be an excellent way to save money, particularly on items like microphones, audio interfaces (ensure drivers are compatible), and studio monitors. Platforms like Reverb.com or local marketplaces often have great deals on equipment that still has plenty of life left. Always check seller ratings and product condition carefully, but opting for used can allow you to acquire higher-tier gear than if you bought new.
Conclusion
Building a home studio on a budget for underground musicians in 2025 is not just about accumulating gear; it’s about making strategic, informed decisions that maximize your limited resources. By understanding the core functions of a studio, prioritizing essential components like a capable computer, a versatile DAW, reliable audio capture tools, and accurate monitoring devices, you lay a robust foundation for your creative endeavors. Remember the critical role of often-overlooked accessories and the transformative power of even basic acoustic treatment. Most importantly, embrace continuous learning and workflow optimization. Your passion, coupled with smart planning, is the most valuable asset you possess. The journey of sound starts with a single, well-chosen piece of gear, and with patience and persistence, your unique sound will take shape from the comfort of your own budget-friendly domain.


